|
The Calendar mode is designed to simplify your time
management. You can use it to create various appointments, plan
meetings and other assignments. Each appointment record has
built-in alarm options, extended recurring options, priority marker,
category and appointment progress tracker.
For
your convenience and better visualization, the dates, which have
appointments scheduled, are marked with the bold front on the program's calendar.
The
Calendar mode does not show all the appointments recorded, it
displays only appointments planned for the
Day,
Work
Week, Week, Month, Year or selected dates range on the programs
calendar.
C-Organizer has two different Calendar submodes.
When the "Time Grid" mode is on, appointments will be displayed in
the calendar-like manner (time scale for selected day or calendar
cells if you select week, month or year):
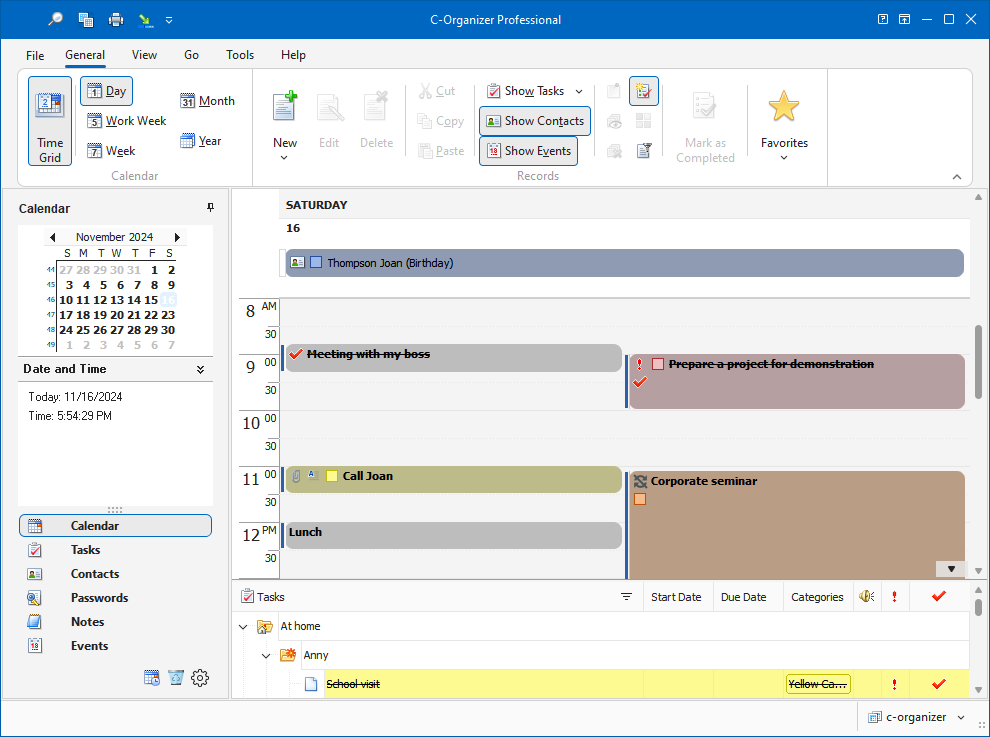
In
this mode C-Organizer also shows birthdays, events and tasks. You
can show or hide them by clicking an appropriate button on the
program's toolbar ("Show
Contacts",
"Show
Events" or
"Show
Tasks").
Moreover, the "Show Tasks" command has several additional options:
Show Tasks for selected
period - when this option is
on, C-Organizer will show tasks, which match to selected period on
the program's calendar.
Show Tasks without date
- if this option is selected,
C-Organizer will include tasks without date into the Today's
report.
Show all Tasks
- when this option is on, C-Organizer
won't filter tasks by period and will show all tasks
entries.
Show Folders
- using this option you can show or
hide all tasks folders.
Minimize Tasks Panel
- when this option is on, you will
see only a small panel at the bottom of window with summary
information: active tasks count and completed tasks count (if "Show
Completed" option is on).
If
the "Time
Grid" mode is off, you will
see your appointments as a list of entries:
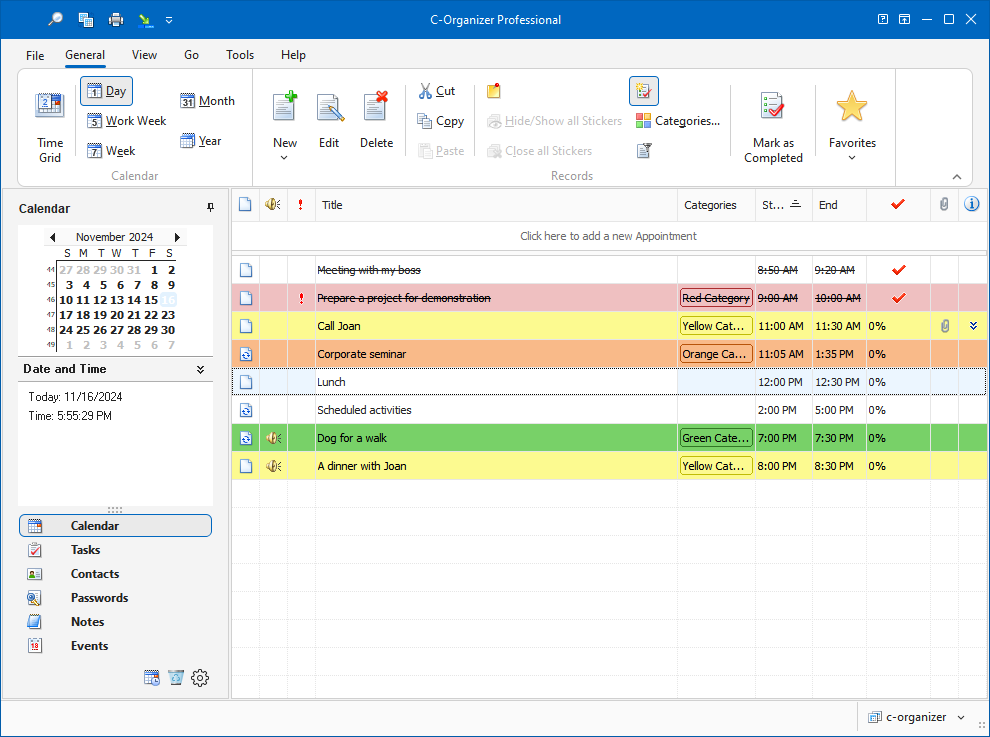
In
this mode C-Organizer shows appointments only (birthdays, events
and tasks are not shown).
All
entries in the list can be filled with the first category color, if
this option is on (see the Calendar Preferences).
The
planned appointment can be transferred to any other day by dragging
and dropping. Just drag the appointment record to the desired date
on the program's calendar using the mouse, and drop it. The
appointment due date will change automatically. Besides, you can
change the appointment time and duration by moving or resizing it
(in the Time Grid mode only).
Also
you can copy or cut any appointment and paste it into other date
using an appropriate buttons on the program's toolbar, or shortcuts
(Ctrl+C, Ctrl+X, Ctrl+V), or using context menu in the Appointments
area.
Every
appointment can be set to repeat. You don't need to create the same
appointment every time, just mark it as a recurring one. To match
you expectations, C-Organizer provides extended
recurring options.
Besides, in the view area you can see an
appointment progress percentage (by clicking the button
"Mark as
Completed" you can mark any
appointment as a completed one), appointment priority and whether
an appointment description is available.
Also
you can filter your entries by category. Just click the
"Filter by
Category" button. In this case
you will see only appointments, which match to the selected
categories. Please note, that this filter will also work for
birthdays, events and tasks in the "Time Grid" mode.
To show or hide completed
appointments click the "Show
Completed" button. When you
are in the List of entries mode, the expired records will be
displayed in the red
font color.
When
appointment description is available, you can view it by pressing
the following button:  near the entry title (in the List
mode). Furthermore, any appointment can be posted as an electronic
sticker on a computers monitor. Just select an appointment and
click the "Show as
Sticker" button.
near the entry title (in the List
mode). Furthermore, any appointment can be posted as an electronic
sticker on a computers monitor. Just select an appointment and
click the "Show as
Sticker" button.
See
the chapter How to preview a record and to work with stickers
for more details.
Each entry can be edited directly
in the view area, in the List mode you even can create a new entry
by entering data in the upper row.
|

