|
To
print your information or a calendar, click the
"Print"
button or use the Ctrl + P shortcut in the main window.
A
print dialog box will appear. In this window are available two main
print options: "Print
calendar" and
"Print
records list".
Printing
Calendar:
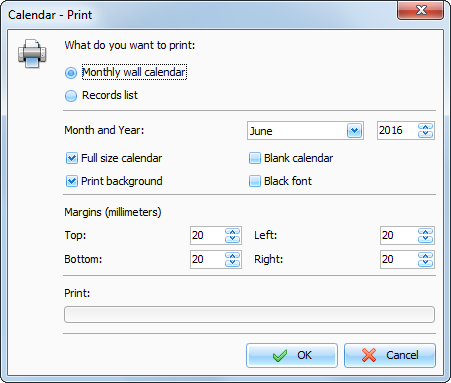
When
the "Print calendar" is selected, you can choose following
options:
Month and Year
- which month will be
printed
Full size calendar
- When this options is turned on, the
calendar will be stretched to fit the print area.
Print background
- will print desktop background
picture.
Blank calendar
- the entries won't be printed if
this option is turned on.
Black font - all font colors in the calendar will be
replaced with the black color. This options is useful if you will
print without background, for example.
Margins
- select margins of the print
area.
After
setting all desired options, click the "OK button. Calendar will be printed.
Printing records list:
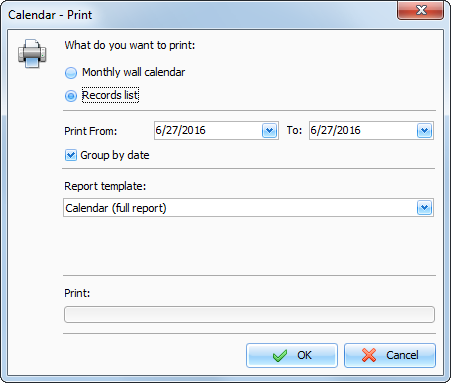
When
you print the records list, following options are available:
Print From ... To
- the dates range for
printing.
Group by date
- when this option is turned on, the
days will be separated.
Report template
- here you can choose one of
available print templates.
After
setting all desired options, click the "OK button. "Print
Preview" window will be opened.
|

